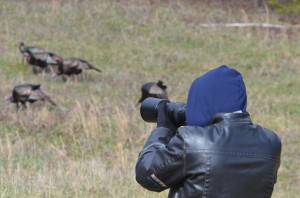
An unprepared rookie’s guide to wildlife photography

Let me begin by saying that I know about as much about photography as I do about nuclear physics, so, nothing.
When I began Dr. Drew Crain’s wildlife photography course, I had no camera or money to buy a camera, and since I had no internet over winter break, I had no idea what type of camera I should borrow.
This should give you some idea of how unprepared I was when the course began.
Needless to say, I was a bit lost when the class began, so I spent several days bumbling through Cade’s Cove with a borrowed camera (thanks to a good friend of mine) and no clue as to what I was doing.
During this time, I scared off many deer, which—trust me—is actually hard to do, and I missed hundreds of picture perfect shots.
However, it is this incredibly rocky start that inspired me to make a five-step guide to help the unprepared, clumsy souls out there who may want to try something completely new, just as I did.
The first step is to familiarize yourself with your camera (or your friend’s, in my case), especially if you borrowed a more advanced Digital SLR (single-lens reflex), like a Nikon D40 or a Cannon EOS. For the purposes of this class, I’d advise you to borrow or purchase a Nikon so that you can use the lenses that Dr. Crain has.
However, even if you are using a regular digital compact camera, you can get great pictures—if you know what you are doing.
Be sure to take the time to learn the camera and all of its ins and outs. Trust me, you don’t want to have amazing shots slip away because you were still trying to figure out how to adjust the camera to the lighting around you. It can be overwhelming and complicated at first, but it will be way easier if you practice before you even get to class.
The second step is to familiarize yourself with photography lingo such as “shutter-speed,” “aperture,” “F-stop,” “focal length” and “exposure.” Knowing what these terms mean before the first day of class will save you from staring shell-shocked at Dr. Crain while desperately trying to understand what he’s talking about.
A tried and true method for learning these terms, or at least having a slight grasp on them, is a simple Google search away. It will help exponentially in the long run, especially for aperture and F-stop, which are interconnected.
The third step is never ever to run in Cade’s Cove.
You never know if there is a deer or bird on the other side of the next bush or thicket in front of you. Also, running in woods can increase the chances of you falling if you are clumsy. I found this out on a daily basis while displaying my poor woodsman skills.
The fourth step is to know the animals as well as you can. For example, if you know that the deer are likely to escape from the approaching half-circle you and your classmates have made, you can then position yourself on the other side of a fence, if it is headed towards one, in order to capture the amazing shot of deer jumping. The animal’s behavior can be the most important variable in getting a good shot.
No one wants a picture of a deer’s backside as it’s going over the fence.
The fifth and most important step to being prepared is to set multiple alarms for those early-morning trips to Cade’s Cove. You don’t want to be that kid who didn’t eat beforehand and isrunning to class so he doesn’t get left behind. This usually leads to being hungry, under-dressed for the cold day and more tired than you would have normally been for the hour.
There are many other things that I learned from the class than these, but I don’t want to take all of the challenge out of trying something new. But if you take these steps, you’ll make an already awesome class even better and be in a much better position to learn from one of the best teachers I have had at MC.
Plus, it will help you have the best pictures, which is, after all, the most important thing besides having fun.
After all, it is J-term.

